
I was terrified when I first started painting outdoors! I was convinced that people would be rude about my work, or that my easel would blow away, or… a thousand fears ran through my mind. Despite my catastrophising, I somehow plucked up the courage to get out there - and I haven’t looked back since. These are some of the things I wish I knew back then. I hope they help you if you’re thinking about painting outdoors.

My very first solo plein air painting expedition - the rose garden in Southsea, UK.
Tip # 1: You’ll need an easel. Choose carefully. Until recently, I used a super lightweight aluminium easel that I picked up for £15 at Hobbycraft (they don’t stock them any more but this one on Amazon is the same). It weighs almost nothing and packs away very small. I love it. Now I have the French box easel I always wanted (this one) which is very beautiful but a lot more complicated to set up and take down and a lot heavier at around 5kg. I’m in love with it but I also loved the super lightweight one I started with. Your easel choice will be led by your own taste and budget, but I would strongly recommend starting out with the simplest possible equipment.
Tip #2: Wear a good hat and sunscreen. There’s nothing as distracting as sunburned hands or the sensation that your face is on fire! Male or female, hair grips are your friend to keep your hat on (pin them into your hair and through the hat band. Women have been doing this for hundreds of years...).
Tip #3: Make it easy for yourself to begin with. My biggest fear at the beginning (and this is apparently very common) was how other people would react and what they might say. You'll discover in time that people are very kind, but if this is a worry, pick a spot where people can't come behind you to see what you're doing. Then, if they're really curious, they have to ask and you can immediately say "this isn't finished" before they look and draw breath to comment 🤣
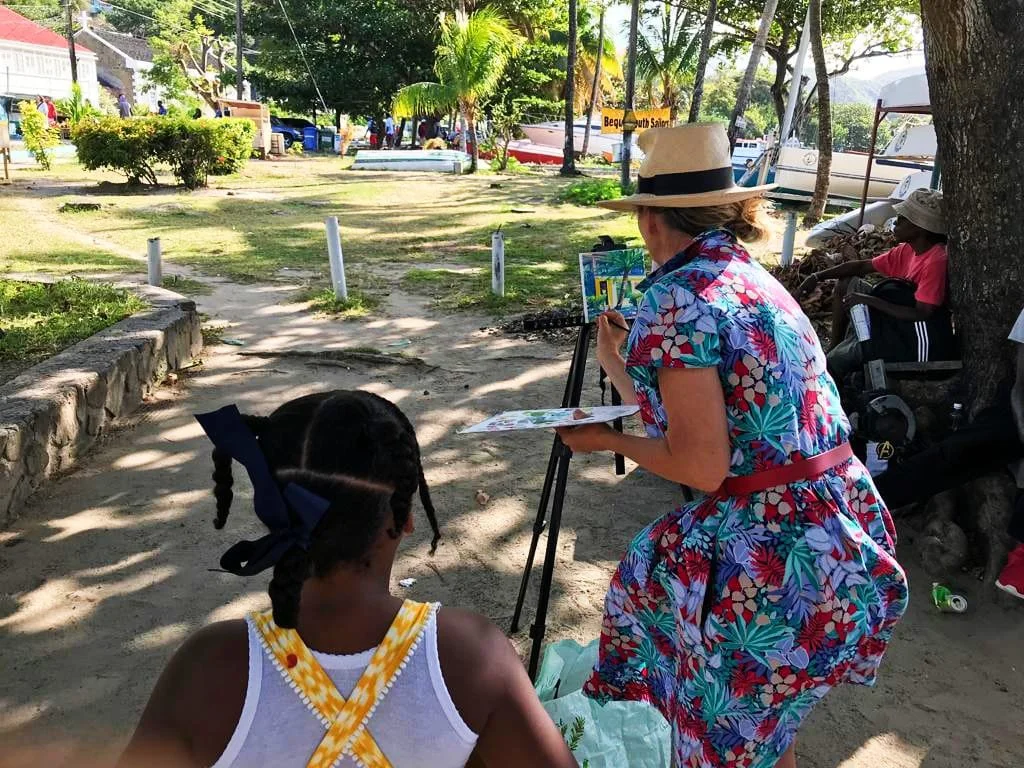
Painting in the shade of a convenient tree on the island of Bequia in the Caribbean.
Shade? check. Hat? check. Sunscreen? Check check check!
Tip #4: Keep your painting in the shade, even if it means you have to turn the canvas 180 degrees away from the subject and turn to look. If you don't, seeing the colours becomes incredibly hard and in my experience, you end up with a very pale/washed-out painting where the differences in shade are far too subtle for normal lighting conditions. I don't have a parasol so I use a handy tree/ building shade where I can. Other people use purpose-made or pram parasols, and I’ve seen people with their own pop-up gazebo. I really like to travel light, so that’s not for me but a parasol might be a good future investment, maybe like this one.
Tip #5: Don’t schlepp every art material you own. Pack as follows:
- paints, selectively. I pack whole tubes of colour. Other artists I know dispense their paints onto a strip of plastic or wood which fits inside an airtight container. I like to take the whole tubes as I would hate to run out.
- a palette of some kind. I prefer to use a disposable paper palette so that clearing up afterward is easier. You might prefer a wooden or plastic one, but consider how quickly and easily you can clean it and pack it away afterwards. Painting outside can be really tiring so make it easy for yourself.
- dispense your mediums into small jars (the ones you buy eg salmon roe in are just the ideal size for this). No need to take the whole bottles.
- a handful of mixed brushes
- 1 or 2 canvases or panels, in a couple of sizes/shapes, ready primed/gessoed. Size is personal preference, but I’d recommend starting smallish because you need to get used to painting a whole view in a limited amount of time.
- a pack of baby wipes, cheapest ones work just fine
- kitchen roll/ rags
- a roll of small bin bags
- a bag with handles - to weigh down my easel if the wind picks up (this was more of a problem with the aluminium lightweight easel than with the new one)

Painting the view on the incredible island of Mustique in the Caribbean. I adored it there and wanted to stay longer.
Also - you see that black velcro loop hanging from the easel, right under my painting? That’s where I hang bags with all my paints and water etc in if the wind picks up. Stops my paintings going for a swim…
Tip #6: If you’re considering selling your work, take business cards with you if you have them. Be prepared for people to ask if you sell your work, and/or if you are online somewhere. If you don’t have business cards, have something handy to write on. Make a note of email addresses if you can. I have sold many paintings by promising to send pictures of the painting once it’s finished.
Tip # 7: Take photos regularly of the view you're painting. That way you can finish in the studio/back on board (in my case) if the light changes too much or you have to leave for some other reason. My small pile of unfinished plein air paintings, of views I will likely never see again, are proof that I have learned this lesson the hard way!
Tip #8: Think about how you will get wet work home. Keep it as simple as possible. There are a variety of solutions available if you are not just driving home in your own car, including canvas and panel carriers. When I grow up, I’d like one of these panel carriers but in the meantime, I just lay my paintings flat in the boot of my car or carry them home in my hand. In the dinghy, I hold tight to my painting with both hands and hope that my husband won’t have to swerve really quickly which would cause both me and the painting to go for a swim…
Tip #9: Wear layers. It doesn’t matter where you are in the world (I should know) - the weather can be very fickle. Don’t forget, you won’t be moving around very much, so it’s easy to get cold. Also, if the sun moves round, you might find yourself standing in the sunshine and needing to remove layers - or put them on to stop getting sunburned. A windcheater of some kind might be a lifesaver and they weigh nothing to pack. My secret tip here for painting in cooler climes are the amazing recycled cashmere fingerless gloves from Turtle Doves.
Tip #10: Take snacks and drinks with you. A thermos flask might be your best friend- keeping water cold in the heat, or full of a comforting hot drink when it’s chilly. Chocolate, a banana, a packet of biscuits - whatever you like, but take something with you. Oh, and don’t forget to pop to the loo before you leave…
Tip #11: Let someone know where you’re going, especially if you’re heading off the beaten track, and when you can be expected back. The best spots are often places where few people go . Aside from the obvious personal risks, a flat tyre and no mobile phone signal, or a sprained ankle - and no chance of anyone noticing that you’re still up the mountain - could really spoil your day! Some of the best fun I have had plein air painting has been when other people have come painting with me, or when I have managed to convince someone (eg my husband) that he wants to come and read a book while I paint. I love to have quiet company while I paint, but painting alone is also wonderful.

Never take yourself tooooo seriously ;)
Tip #12: Don’t take any of it - or yourself - too seriously. This is meant to be fun. Sometimes you will create something amazing that you will immediately love, and sometimes you will have a really challenging time with eg the weather or getting your colours right. It doesn’t matter. You can always finish the work in the studio - or you can wait for it to dry and paint right over it if you hate it that much! The point is - you’re practising. And it should be fun!
I hope these tips are useful! I’d love to hear how you get on and see your work if you put any of them into action.
Happy painting!
Em
x